Bread Sculpture Dough
 My friend Jill and I have decided that we must have been twins separated at birth. We are both certifiable recipe-aholics with no recipe too difficult to tackle and no ingredient too strange to track down. If one of us needs an expensive, obscure ingredient, she’ll call me or I’ll call her and we’ll split the cost of the ingredient and share.
Several years ago when Jill’s boss, Kate, asked her to cater a sit-down meal for 14 employees who had flown in for a global HR meeting, she said she’d do it but only if I could do it with her. So, we had the day off from our administrative assistant jobs and put on chef’s jackets and cooked all day together—just for the fun of it! We both laugh now when we think about all the courses we made, each one more involved than any sane person would have attempted. On top of that, Kate insisted that we eat with the group. So, there we were hopping up and down between courses as we crazily tried to keep cooking, plating, and serving the food. We threw in the towel at the end and gratefully accepted help from a few fellow co-workers who picked up the plates and did a conga dance into the dining room to serve the food. It was a night Jill and I will always remember.
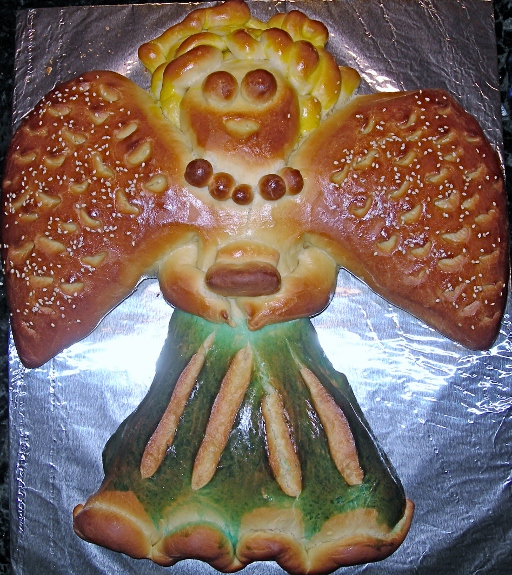
Last month, Jill made a beautiful sculpted bread that just blew me away. I told her that she had to do a guest post because it just had to be shared. She kindly consented, and now we are all the beneficiaries of her wonderful bread-making skills. Thanks, Jill!
Guest post by Jill, my friend and fellow foodie
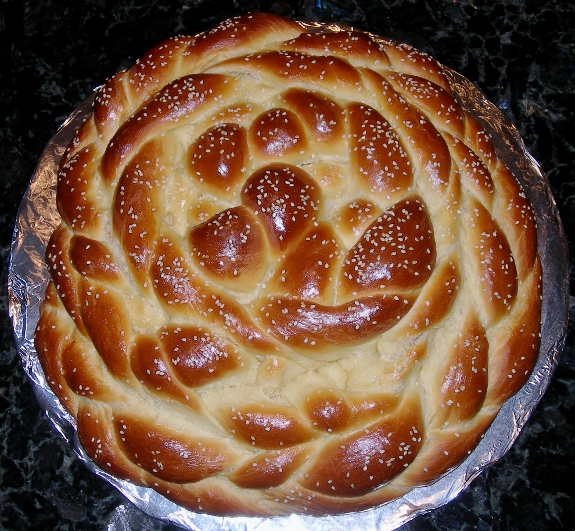
The dough recipe is enough for one large (about 2 lb.) loaf. In deciding your design, choose a form that you can put together with simple geometric shapes—ropes, rounds, ovals and oblongs of dough. Keep the outline bold, the detail simple. For a maximum-size sculpture, you’ll need to overlap two rimless baking sheets, adjusting them to fit your oven while leaving a 1-inch space all around for heat circulation. Wrap the sheets with foil. It may help to draw a full-size platter on a sheet of parchment that fits the overlapped sheets. Or, a half sheet pan should be sufficient for the sculpture. This is an easy dough to work with. Kids love ‘playing’ with this dough and then seeing their creations come from the oven. I’ve made Christmas trees, angels, Santa heads, teddy bears and braided rounds. The taste is wonderful, and it keeps for several days due to the richness of the ingredients. Get creative!
Bread Sculpture Dough
Ingredients
- 1 pkg. active dry yeast
- 1/4 cup warm water – about 110o F
- 3/4 cup butter or margarine at room temperature
- 1/2 cup sugar
- 1/3 cup warm milk – about 110o F (I wouldn’t use less than 2% milk)
- 1/2 tsp. salt
- 5 large eggs
- 5 to 5-1/2 cups all-purpose flour, unsifted
- 1 egg beaten with 1 tbl. water for glaze (add a pinch of sugar)
Directions
In a large bowl of Kitchen Aid stand mixer, dissolve yeast in water. Let sit for a few minutes then stir in next 5 ingredients until thoroughly blended. Gradually beat in about 4-3/4 cups flour to make a stiff dough — DO NOT KNEAD. Cover and let dough rise until doubled — about 1-1/2 hrs.
Beat down to release air; then knead on a lightly floured board until smooth and satiny, 10-20 minutes, adding flour as needed to prevent sticking. You can do this using dough hook in your stand mixer if you have one.
Divide dough into portions to fit your design, saving a small piece for decorative detail. Build sculpture on the greased, foil-covered, overlapped baking sheets. I use parchment paper over the greased pan for easy removal after it’s baked. I use large cookie sheets.
For a solid area, shape dough into a ball and place smooth side up on the foil; then pat or roll out to achieve desired dimension and form, making no thicker than about 1 inch or bread may crack during baking. Don’t forget, this is going to rise before and during the baking process. Keep shapes about half as plump as you’ll want them to be in the end product.
Butt pieces of dough close together if they are to be joined. Leave at least 2 inches of space between parts you don’t want to join. To attach small, round details, i.e., eyes, noses, beaks, feet, shape these into tear drops and set, points down, into holes poked into background dough. To create surface detail, such as mermaid’s scales or to separate areas like fingers or feathers, snip dough with kitchen scissors held at an angle. Roll pieces of dough between your hands to make strands for arms, legs or hair. Try twisting, curling or braiding strands.
Cover sculpture lightly and let rise in a warm place until puffy (about 30 minutes). Brush gently with egg mixture. Bake in a preheated 350o F oven for about 30 minutes or until bread is richly browned and sounds hollow when tapped. Let cool on pan for 10 minutes; then slip a spatula beneath loaf and gently slide onto rack to cool completely. Makes one large loaf.

Source: Sunset “Cookbook of Breads” from 1977
